Hello World Walkthrough
- Introduction
- Setup and Requirements
- Create your Node.js application
- Create a Docker container image
- Create your cluster
- Create your pod
- Allow external traffic
- Scale up your website
- Roll out an upgrade to your website
- Observe the Kubernetes Web UI (optional)
- That’s it! Time to tear it down
Introduction
The goal of this codelab is for you to turn a simple Hello World node.js app into a replicated application running on Kubernetes. We will show you how to take code that you have developed on your machine, turn it into a Docker container image, and then run that image on Google Container Engine.
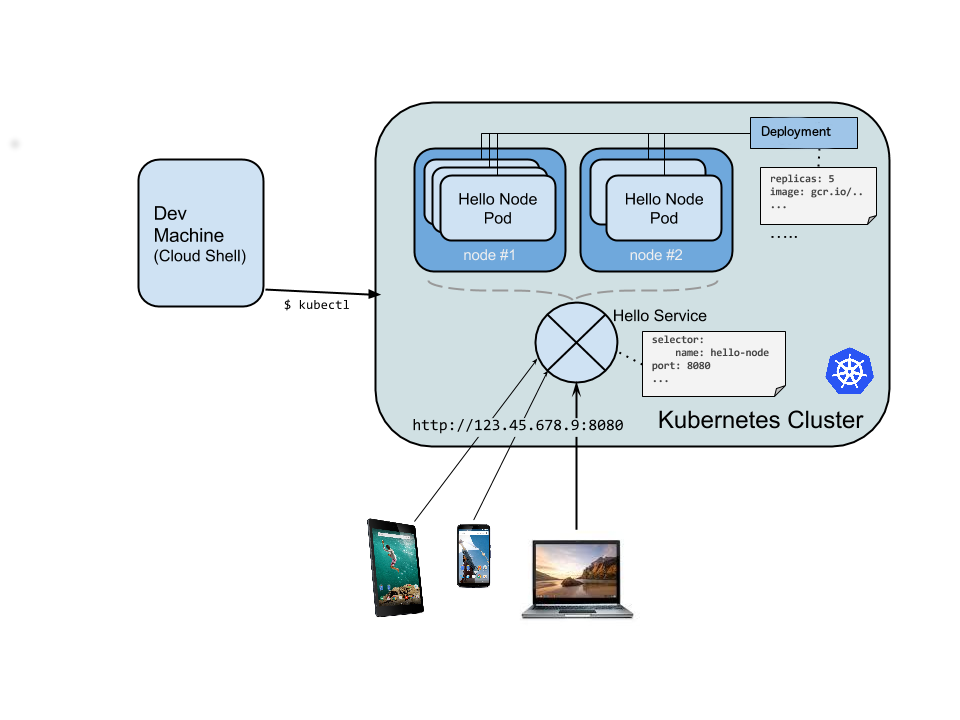
Here’s a diagram of the various parts in play in this codelab to help you understand how pieces fit with one another. Use this as a reference as we progress through the codelab; it should all make sense by the time we get to the end.
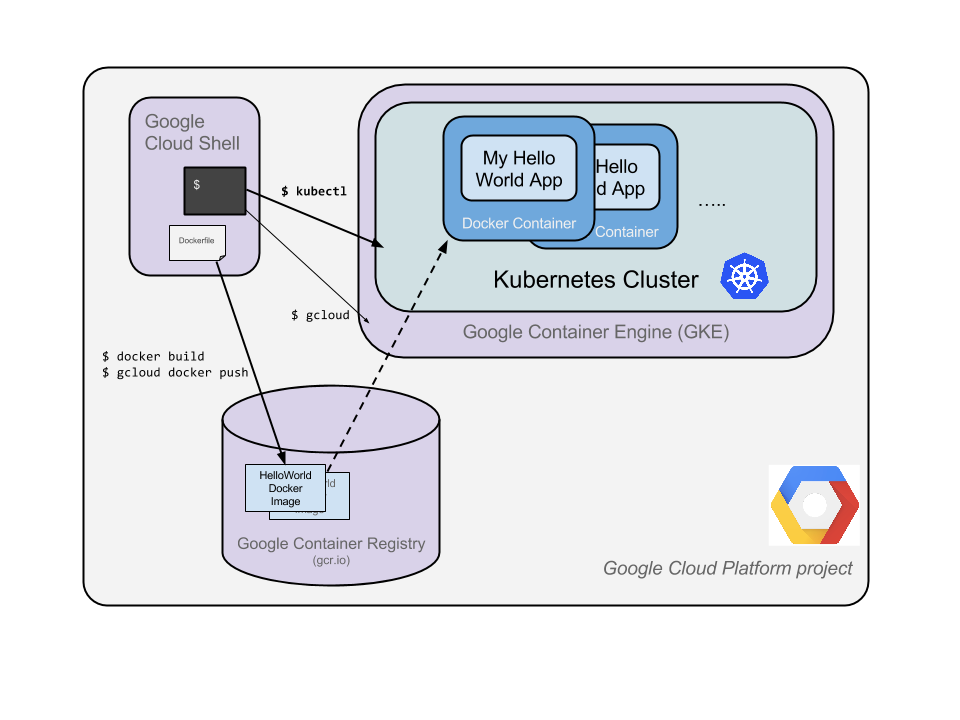
Kubernetes is an open source project which can run on many different environments, from laptops to high-availability multi-node clusters, from public clouds to on-premise deployments, from virtual machines to bare metal. Using a managed environment such as Google Container Engine (a Google-hosted version of Kubernetes) will allow you to focus more on experiencing Kubernetes rather than setting up the underlying infrastructure.
Setup and Requirements
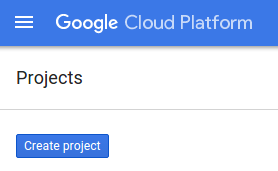
If you don’t already have a Google Account (Gmail or Google Apps), you must create one. Then, sign-in to Google Cloud Platform console (console.cloud.google.com) and create a new project:
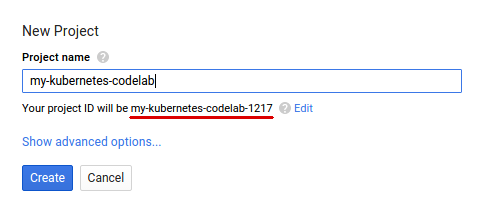
Remember the project ID; it will be referred to later in this codelab as PROJECT_ID.
Next, enable billing in the Developers Console in order to use Google Cloud resources and enable the Container Engine API.
New users of Google Cloud Platform receive a $300 free trial. Running through this codelab shouldn’t cost you more than a few dollars of that trial. Google Container Engine pricing is documented here.
Next, make sure you download Node.js.
Then install Docker, and Google Cloud SDK.
Finally, after Google Cloud SDK installs, run the following command to install kubectl:
gcloud components install kubectl
You’re all set up with an environment that can build container images, run Node apps, run Kubernetes clusters locally, and deploy Kubernetes clusters to Google Container Engine. Let’s begin!
Create your Node.js application
The first step is to write the application. Save this code in a folder called “hellonode/” with the filename server.js:
server.js
var http = require('http');
var handleRequest = function(request, response) {
  response.writeHead(200);
  response.end("Hello World!");
}
var www = http.createServer(handleRequest);
www.listen(8080);
Now run this simple command :
node server.js
You should be able to see your “Hello World!” message at http://localhost:8080/
Stop the running node server by pressing Ctrl-C.
Now let’s package this application in a Docker container.
Create a Docker container image
Next, create a file, also within hellonode/ named Dockerfile. A Dockerfile describes the image that you want to build. Docker container images can extend from other existing images so for this image, we’ll extend from an existing Node image.
Dockerfile
FROM node:4.4
EXPOSE 8080
COPY server.js .
CMD node server.js
This “recipe” for the Docker image will start from the official Node.js LTS image found on the Docker registry, expose port 8080, copy our server.js file to the image and start the Node server.
Now build an image of your container by running docker build, tagging the image with the Google Container Registry repo for your PROJECT_ID:
docker build -t gcr.io/PROJECT_ID/hello-node:v1 .
Now there is a trusted source for getting an image of your containerized app.
Let’s try your image out with Docker:
$ docker run -d -p 8080:8080 gcr.io/PROJECT_ID/hello-node:v1
325301e6b2bffd1d0049c621866831316d653c0b25a496d04ce0ec6854cb7998
Visit your app in the browser, or use curl or wget if you’d like :
$ curl http://localhost:8080
Hello World!
Let’s now stop the container. In this example, our app was running as Docker process 2c66d0efcbd4, which we looked up with docker ps:
docker ps
CONTAINER ID        IMAGE                              COMMAND
2c66d0efcbd4        gcr.io/PROJECT_ID/hello-node:v1    "/bin/sh -c 'node

docker stop 2c66d0efcbd4
2c66d0efcbd4
Now that the image works as intended and is all tagged with your PROJECT_ID, we can push it to the Google Container Registry, a private repository for your Docker images accessible from every Google Cloud project (but also from outside Google Cloud Platform) :
gcloud docker push gcr.io/PROJECT_ID/hello-node:v1
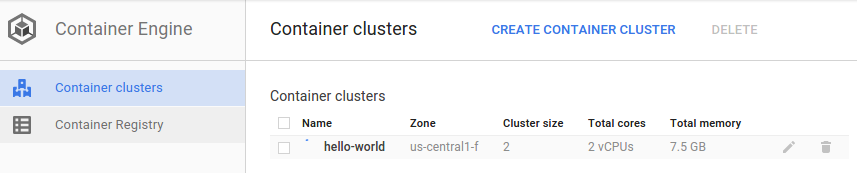
If all goes well, you should be able to see the container image listed in the console: Compute > Container Engine > Container Registry. We now have a project-wide Docker image available which Kubernetes can access and orchestrate.

Create your cluster
A cluster consists of a master API server and a set of worker VMs called nodes.
Create a cluster via the Console: Compute > Container Engine > Container Clusters > New container cluster. Set the name to ‘hello-world’, leaving all other options default. You should get a Kubernetes cluster with three nodes, ready to receive your container image.
It’s now time to deploy your own containerized application to the Kubernetes cluster! Please ensure that you have configured kubectl to use the cluster you just created:
$ gcloud container clusters get-credentials hello-world
The rest of this document requires both the kubernetes client and server version to be 1.2. Run kubectl version to see your current versions. For 1.1 see this document.
Create your pod
A kubernetes pod is a group of containers, tied together for the purposes of administration and networking. It can contain a single container or multiple.
Create a pod with the kubectl run command:
$ kubectl run hello-node --image=gcr.io/PROJECT_ID/hello-node:v1 --port=8080
deployment "hello-node" created
As shown in the output, the kubectl run created a deployment object. Deployments are the recommended way for managing creation and scaling of pods. In this example, a new deployment manages a single pod replica running the hello-node:v1 image.
To view the deployment we just created run:
$ kubectl get deployments
NAME         DESIRED   CURRENT   UP-TO-DATE   AVAILABLE   AGE
hello-node   1         1         1            1           3m
To view the pod created by the deployment run:
$ kubectl get pods
NAME                         READY     STATUS    RESTARTS   AGE
hello-node-714049816-ztzrb   1/1       Running   0          6m
To view the stdout / stderr from a pod (hello-node image has no output, so logs will be empty in this case) run:
kubectl logs <POD-NAME>
To view metadata about the cluster run:
kubectl cluster-info
To view cluster events run:
kubectl get events
To view the kubectl configuration run:
kubectl config view
Full documentation for kubectl commands is available here:
At this point you should have our container running under the control of Kubernetes but we still have to make it accessible to the outside world.
Allow external traffic
By default, the pod is only accessible by its internal IP within the Kubernetes cluster. In order to make the hello-node container accessible from outside the kubernetes virtual network, you have to expose the pod as a kubernetes service.
From our development machine we can expose the pod to the public internet using the kubectl expose command combined with the --type="LoadBalancer" flag. The flag is needed for the creation of an externally accessible ip:
kubectl expose deployment hello-node --type="LoadBalancer"
If this fails, make sure your client and server are both version 1.2. See the Create your cluster section for details.
The flag used in this command specifies that we’ll be using the load-balancer provided by the underlying infrastructure (in this case the Compute Engine load balancer). Note that we expose the deployment, and not the pod directly. This will cause the resulting service to load balance traffic across all pods managed by the deployment (in this case only 1 pod, but we will add more replicas later).
The Kubernetes master creates the load balancer and related Compute Engine forwarding rules, target pools, and firewall rules to make the service fully accessible from outside of Google Cloud Platform.
To find the ip addresses associated with the service run:
$ kubectl get services hello-node
NAME         CLUSTER_IP    EXTERNAL_IP     PORT(S)    SELECTOR         AGE
hello-node   10.3.246.12                   8080/TCP   run=hello-node   23s
The EXTERNAL_IP may take several minutes to become available and visible. If the EXTERNAL_IP is missing, wait a few minutes and try again.
$ kubectl get services hello-node
NAME CLUSTER_IP EXTERNAL_IP PORT(S) SELECTOR AGE
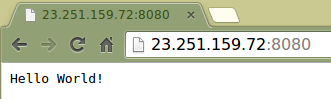
hello-node 10.3.246.12 23.251.159.72 8080/TCP run=hello-node 2m
Note there are 2 IP addresses listed, both serving port 8080. CLUSTER_IP is only visible inside your cloud virtual network. EXTERNAL_IP is externally accessible. In this example, the external IP address is 23.251.159.72.
You should now be able to reach the service by pointing your browser to this address: http://EXTERNAL_IP:8080 or running curl http://EXTERNAL_IP:8080
Scale up your website
One of the powerful features offered by Kubernetes is how easy it is to scale your application. Suppose you suddenly need more capacity for your application; you can simply tell the deployment to manage a new number of replicas for your pod:
kubectl scale deployment hello-node --replicas=4
You now have four replicas of your application, each running independently on the cluster with the load balancer you created earlier and serving traffic to all of them.
$ kubectl get deployment
NAME         DESIRED   CURRENT   UP-TO-DATE   AVAILABLE   AGE
hello-node   4         4         4            3           40m
$ kubectl get pods
NAME                         READY     STATUS    RESTARTS   AGE
hello-node-714049816-g4azy   1/1       Running   0          1m
hello-node-714049816-rk0u6   1/1       Running   0          1m
hello-node-714049816-sh812   1/1       Running   0          1m
hello-node-714049816-ztzrb   1/1       Running   0          41m
Note the declarative approach here - rather than starting or stopping new instances you declare how many instances you want to be running. Kubernetes reconciliation loops simply make sure the reality matches what you requested and take action if needed.
Here’s a diagram summarizing the state of our Kubernetes cluster:
Roll out an upgrade to your website
As always, the application you deployed to production requires bug fixes or additional features. Kubernetes is here to help you deploy a new version to production without impacting your users.
First, let’s modify the application. On the development machine, edit server.js and update the response message:
response.end("Hello Kubernetes World!");
We can now build and publish a new container image to the registry with an incremented tag:
docker build -t gcr.io/PROJECT_ID/hello-node:v2 .
gcloud docker push gcr.io/PROJECT_ID/hello-node:v2
Building and pushing this updated image should be much quicker as we take full advantage of the Docker cache.
We’re now ready for kubernetes to smoothly update our deployment to the new version of the application. In order to change
the image label for our running container, we will need to edit the existing hello-node deployment and change the image from
gcr.io/PROJECT_ID/hello-node:v1 to gcr.io/PROJECT_ID/hello-node:v2. To do this, we will use the kubectl edit command.
This will open up a text editor displaying the full deployment yaml configuration. It isn’t necessary to understand the full yaml config
right now, instead just understand that by updating the spec.template.spec.containers.image field in the config we are telling
the deployment to update the pods to use the new image.
kubectl edit deployment hello-node
# Please edit the object below. Lines beginning with a '#' will be ignored,
# and an empty file will abort the edit. If an error occurs while saving this file will be
# reopened with the relevant failures.
#
apiVersion: extensions/v1beta1
kind: Deployment
metadata:
  annotations:
    deployment.kubernetes.io/revision: "1"
  creationTimestamp: 2016-03-24T17:55:28Z
  generation: 3
  labels:
    run: hello-node
  name: hello-node
  namespace: default
  resourceVersion: "151017"
  selfLink: /apis/extensions/v1beta1/namespaces/default/deployments/hello-node
  uid: 981fe302-f1e9-11e5-9a78-42010af00005
spec:
  replicas: 4
  selector:
    matchLabels:
      run: hello-node
  strategy:
    rollingUpdate:
      maxSurge: 1
      maxUnavailable: 1
    type: RollingUpdate
  template:
    metadata:
      creationTimestamp: null
      labels:
        run: hello-node
    spec:
      containers:
      - image: gcr.io/PROJECT_ID/hello-node:v1 # Update this line
        imagePullPolicy: IfNotPresent
        name: hello-node
        ports:
        - containerPort: 8080
          protocol: TCP
        resources: {}
        terminationMessagePath: /dev/termination-log
      dnsPolicy: ClusterFirst
      restartPolicy: Always
      securityContext: {}
      terminationGracePeriodSeconds: 30
After making the change save and close the file.
deployment "hello-node" edited
This updates the deployment with the new image, causing new pods to be created with the new image and old pods to be deleted.
$ kubectl get deployments
NAME         DESIRED   CURRENT   UP-TO-DATE   AVAILABLE   AGE
hello-node   4         5         4            3           1h
While this is happening, the users of the services should not see any interruption. After a little while they will start accessing the new version of your application. You can find more details in the deployment documentation.
Hopefully with these deployment, scaling and update features you’ll agree that once you’ve setup your environment (your GKE/Kubernetes cluster here), Kubernetes is here to help you focus on the application rather than the infrastructure.
Observe the Kubernetes Web UI (optional)
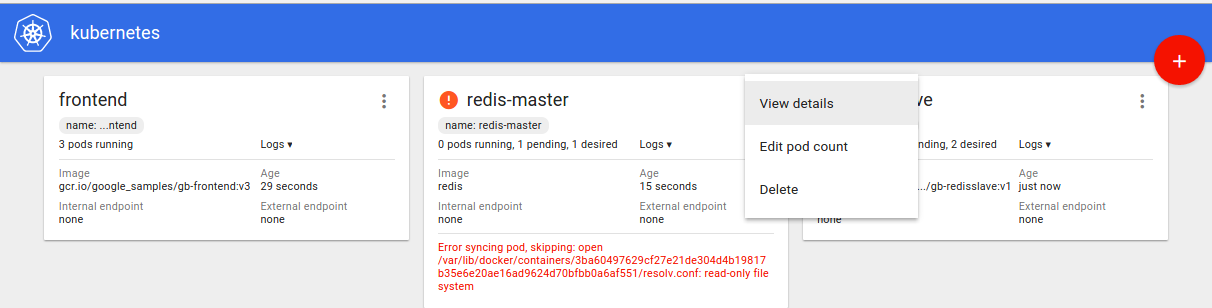
With Kubernetes 1.2, a graphical web user interface (dashboard) has been introduced. It is enabled by default for 1.2 clusters. This user interface allows you to get started quickly and enables some of the functionality found in the CLI as a more approachable and discoverable way of interacting with the system.
Enjoy the Kubernetes graphical dashboard and use it for deploying containerized applications, as well as for monitoring and managing your clusters!
Learn more about the web interface by taking the Dashboard tour.
That’s it! Time to tear it down
That’s it for the demo! So you don’t leave this all running and incur charges, let’s learn how to tear things down.
Delete the Deployment (which also deletes the running pods) and Service (which also deletes your external load balancer):
kubectl delete service,deployment hello-node
Delete your cluster:
$ gcloud container clusters delete hello-world
Waiting for cluster deletion...done.
name: operation-xxxxxxxxxxxxxxxx
operationType: deleteCluster
status: done
target: /projects/kubernetes-codelab/zones/us-central1-f/clusters/hello-world
zone: us-central1-f
This deletes the Google Compute Engine instances that are running the cluster.
Finally delete the Docker registry storage bucket hosting your image(s) :
$ gsutil ls
gs://artifacts.<PROJECT_ID>.appspot.com/
$ gsutil rm -r gs://artifacts.<PROJECT_ID>.appspot.com/
Removing gs://artifacts.<PROJECT_ID>.appspot.com/...
Of course, you can also delete the entire project but note that you must first disable billing on the project. Additionally, deleting a project will only happen after the current billing cycle ends.